Smitten by wanderlust? Want to see the world? Why not start a travel blog to share your experiences with others?
Beyond it just plain being fun to write about your adventures, creating a travel blog might even be able to help you make enough money to fund even more fun adventures.
In this post, we’ll give you a step-by-step tutorial for everything you need to do to start a travel blog.
The 5 things you’ll need to create an awesome travel blog
Beyond your awesome writing and pictures, these are the 5 things you’ll need to build your travel blog.
- Web hosting – this is the engine that will power your travel blog and make it available to visitors around the world. (We recommend SiteGround)
- Domain name – your blog’s permanent address. For example, ours is
themeisle.com. - The free WordPress software – we highly recommend you use self-hosted WordPress, located at wordpress.org. This is different than WordPress.com.
- A WordPress theme – once you install WordPress, your theme controls how your travel blog looks.
- WordPress plugins – plugins help you add functionality to your site without requiring any technical knowledge. You’ll use them to add maps of where you’ve traveled, travel galleries, and more.
Once we show you how to get those basics set up, we’ll also share some tips for how you can create content on your blog, promote it, and maybe even get some extra money online from it.
How to start a travel blog: step-by-step
Here’s your step-by-step guide to start a travel blog:
- Step 1: Pick a niche
- Step 2: Select a domain name
- Step 3: Purchase WordPress hosting and install WordPress
- Step 4: Choose a travel blog theme
- Step 5: Install helpful plugins for travel blogs
- Step 6: Create and add content
- Step 7: Build your blog’s audience
- Step 8: How to make money from your travel blog
Step 1: Pick a niche
There’s a wide choice of travel blog niches to pick from – specific country or area, backpacking, targeted audiences, luxury travel, traveling with kids or pets, and more. Your chances of building a high traffic blog improve if you keep your focus on a few specific areas.
Go with the one you’re most passionate about because you’re in this for the long haul!
Step 2: Select a domain name
Your domain name should be simple and easy to remember.
Using a brand name in the domain may not be an option for you when you’re just starting off. So, you should do the next best thing, select a name that you can build into a brand. Something that’s short, easy to recall, and maybe a bit quirky. Keyword-based names are good too, though you’ll find that most are already taken up.
You could even use your own name if you’re going to maintain a highly personal style throughout your blog. Or, you can use part of your name in a brand – e.g. nomadicmatt.com.
We have some general tips on how to choose a domain name. And if you’re really stuck, you can try using a blog name generator to come up with some ideas.
Step 3: Purchase WordPress hosting and install WordPress
Your hosting is important because it ensures your site loads quickly and is always available to your visitors. There are a ton of quality WordPress hosting services, but a good starting point is SiteGround.
In addition to always scoring well in our annual WordPress hosting survey, SiteGround:
- Is affordable
- Gives you a setup wizard that installs WordPress for you
- Makes it easy purchase your domain name
- Has awesome support if you ever need help
You can choose the cheapest StartUp plan to get started. Then, you just need to follow the simple signup process.
Once you sign up, SiteGround will configure your domain name and install WordPress for you…which means you officially have a working travel blog!
Step 4: Choose a travel blog theme
Your blog’s theme determines how it looks. Luckily, you’ll find a number of free and premium themes, many designed specifically for travel blogs.
When you pick an existing travel blog theme, you’ll instantly get set up with a great-looking travel blog. To help you find such a theme, you can check out lists of the:
Beyond those lists, here are three specific options to get you started:

For example, the Neve theme offers some of the following features:
- Over 100 pre-built sites, including ones that are ideal for blogs and websites focused on travel.
- Compatibility with the Gutenberg Block Editor and also with popular page builders like Elementor.
- Lightning fast performance – consistently ranking among the fastest WordPress themes.
- Clean code designed with SEO in mind.
- Fully-responsive and AMP compatible.
All these built-in features make it super simple to start a travel blog that will look great, and that will load quickly to keep your visitors and the search engines happy.
To install your chosen theme, visit your WordPress dashboard and click Appearance → Themes → Add New.
Step 5: Install helpful plugins for travel blogs
WordPress plugins help you add new functionality to your travel blog without requiring any technical knowledge on your part. They’re one of the things that makes WordPress so awesome. And pretty much every WordPress site makes good use of plugins.
There are some must-have plugins for all sites, including travel blogs. The most commonly used plugins span several categories, most of which are featured below.
👉 The following links will take you to dedicated articles about each topic:
- SEO plugins
- Caching plugins
- Social share button plugins
- Security plugins
- Contact form plugins
- Gutenberg block plugins
Beyond those popular choices, you’ll also want some specific travel plugins. While this can vary depending on your focus area, here are some good ideas:
- A good photo gallery plugin such as NextGEN Gallery to share your travel pictures in a gallery

- Plugins to help integrate with Instagram and Facebook
- Slider plugins to display amazing full-width photos
- A lightbox plugin to allow readers to view your photos in a customizable lightbox
- A map plugin to plot places and routes is a must-have when you want to start a travel blog. It helps to keep your readers stay engaged with you as you move from one place to another. Interactive World Maps plugin is a good premium option.
- Plugins like TravelPayouts help you add a travel booking capability to your blog. It helps your visitors find deals on flights and hotels to different locations while you earn a commission.

Learn how to install WordPress plugins.
Step 6: Create and add content
Once you’ve set up your travel blog’s foundation, you’re ready to start adding content. To write blog posts in WordPress, go to Posts –> Add New in your WordPress dashboard.
From there, you can use the Add Media button to insert images and the text editor to write and format your content:

Step 7: Build your blog’s audience
There are a few channels you can use to grow your blog’s traffic.
With millions of active users, social media can help your content reach the right audience. Adding Social media share buttons makes it easy for readers to share your content. Instagram and Pinterest are suitable platforms to promote your blog, and should form part of your social media strategy.
Beyond that, you should also learn about SEO and topics like keyword research.
Building an email list is another great way to grow a long-term audience.
Step 8: How to make money from your travel blog
Once your starts to get some traffic, here are some ways that you can make money from your blog:
- Affiliate marketing: You can have affiliates for almost everything – accommodation, insurance, travel gear, web hosting. Every time someone clicks on a link resulting in the purchase of an affiliate’s product, you earn a (small) commission.
- Google Adsense: Google generates ads relevant to travel on your blog. When visitors click on the offered ads, you earn revenue.
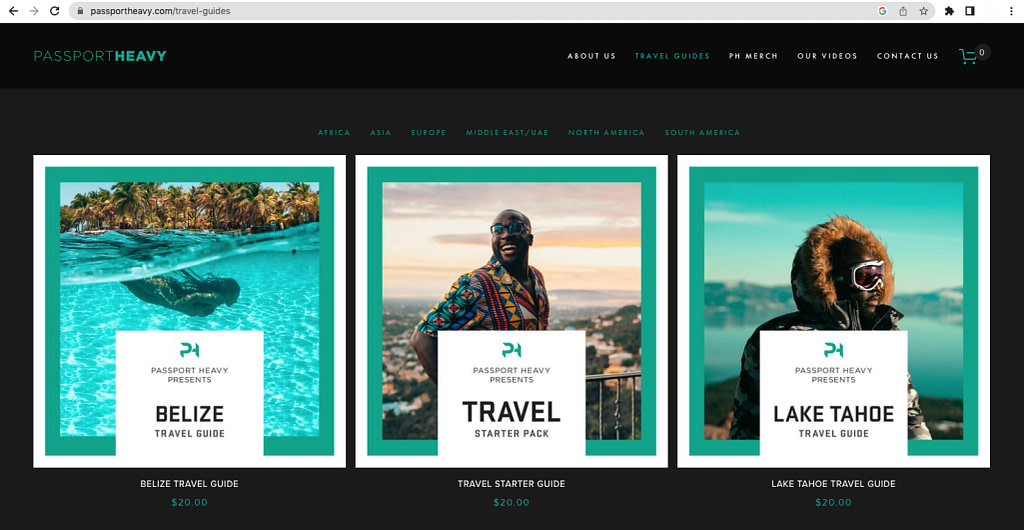
- Premium (gated) content: You can sell digital guides for the places that you’ve visited to save other travelers time.
- Add a donation button: Obviously, this can work only when you’ve built up a dedicated readership.
- Offer personalized advice: Offer travel related advice for payment of a fee, or offer personalized or guided tours of specific places, or curate travel plans.
- Sponsored posts: Travel related businesses may pay you to write about them on your blog. Just make sure to be transparent.
- Sponsored trips: Tourism boards, private companies or brands can ask you to visit their places and write about it.
- Workshops: Accept offers to conduct travel-related workshops.
Wrapping up 🏁
That wraps up our guide. If you made it this far, congratulations on creating your own travel blog!
Have any other questions about how to start a travel blog? Leave a comment and we’ll try to help out.
Free guide
4 Essential Steps to Speed Up
Your WordPress Website
Follow the simple steps in our 4-part mini series
and reduce your loading times by 50-80%. 🚀
Free Access
* This post contains affiliate links, which means that if you click on one of the product links and then purchase the product, we’ll receive a commission. No worries though, you’ll still pay the standard amount so there’s no additional cost on your part.


Or start the conversation in our Facebook group for WordPress professionals. Find answers, share tips, and get help from other WordPress experts. Join now (it’s free)!