
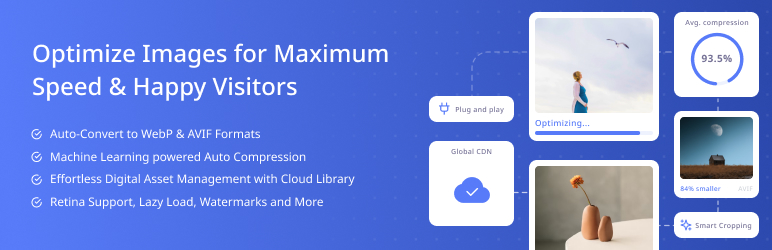
Images slow down your site. Plain and simple. But images are still essential for their visual allure, so you can’t just ignore them in the name of performance. To get the best of both worlds, you can use a WordPress image optimizer plugin to compress and optimize images for peak performance. As a result, readers will enjoy the beautiful images and your site will still load fast.
It’s a win-win!
When it comes to WordPress image optimizer plugins, you have six excellent options.
📚 To begin with, we’ll test how much each plugin can compress a sample image. Then, we’ll jump into the actual interface for all six image optimizers and we’ll show you how they work and how much they cost.
Let’s get to optimizing!
Hands-on tests with these image optimizer plugins
To find the best image optimization plugin for WordPress, we have to put these tools to the test. We want to see how effectively each plugin could optimize the same image.
This gets a bit tricky, since some of the WordPress image optimizer plugins offer varying levels of optimization. For instance, Imagify has Normal, Aggressive, and Ultra optimization modes. Optimole, on the other hand, optimizes all images based on the same defaults, or the ones set by you.
In addition, some optimizers provide automated resizing tools, which can cut down the file size drastically.
Because of those differences, it’s hard to come up with an objective comparison. But we have a process to make our test as accurate as possible. Here’s how we’re going to do it:
- We’ll run two tests: one for JPG files and one for PNGs.
- We’ll stick with the default settings for all plugins and not resize the photos at all.
Though it’s not a perfect comparison, by sticking with the default settings, we’re emulating the experience for a casual user. By that, we mean that the average user would typically install the image compression plugin and not mess with too many default settings. This is what we’re interested in most—how each WordPress image optimizer performs right out of the box, without forcing the user to complete any tedious steps.
Testing each WordPress image optimizer with JPG files
Here’s our JPG test subject:

This is a 3000 x 2000px JPG image with a size of 3.9 MB. It’s a high-resolution landscape shot with a range of complex colors, and elements we can use to notice any imperfections during the compression.
And here are the test results after running the JPG through each WordPress image optimizer:
| Plugin | Original Size | Size After Optimization | Optimization Percentage | Types of Compression Offered |
|---|---|---|---|---|
| ShortPixel | 3.9 MB | 400 KB | 90% | Lossy, Glossy, and Lossless |
| EWWW | 3.9 MB | 593.6 KB | 84.2% | Lossy |
| TinyPNG | 3.9 MB | 852.8 KB | 78% | Lossy |
| Optimole | 3.9 MB | 1.18 MB | 69.6% | Lossy and Lossless |
| Imagify | 3.9 MB | 2.07 MB | 47% | Lossy and Lossless |
| Smush | 3.9 MB | 1 MB | 73% | Lossy and Lossless |
Note: Lossy compression usually produces the smallest image sizes without losing quality, making it the best option in most situations.
Sticking with default settings, ShortPixel is the clear winner, coming in with a ~90% reduction in file size using its lossy compression. EWWW gets second place, and TinyPNG isn’t far behind.
Smush and Optimole also had respectable numbers, decreasing the JPG size by ~73% and ~70%, respectively. Despite using lossy compression, Imagify only shrank the image by ~47%.
Testing each WordPress image optimizer with PNG files
Here’s the PNG test image:

The file is a 1311 x 1138px screenshot of the Neve theme with a starting size of 446 KB. The PNG offers more of a focus on white space, illustrations, and clean lines, which makes compression a little different from what you’d expect from a JPG photograph. You’ll also notice that varying file sizes produce unique compression results.
| Plugin | Original Size | Size After Optimization | Optimization Percentage | Types of Compression Offered |
|---|---|---|---|---|
| ShortPixel | 446 KB | 100 KB | 77% | Lossy, Glossy, and Lossless |
| Imagify | 446 KB | 164.5 KB | 62% | Lossy and Lossless |
| EWWW | 446 KB | 164.6 KB | 62% | Lossy |
| Optimole | 446 KB | 181 KB | 59.4% | Lossy and Lossless |
| TinyPNG | 446 KB | 190.1 KB | 57% | Lossy |
| Smush | 446 KB | 126 KB | 70.9% | Lossy and Lossless |
This time, the competition was more fierce. ShortPixel remained in the top spot with 77% optimization, yet Smush surged up through the rankings to claim the #2 spot, with ~71% optimization. To make things even closer, Imagify and EWWW both optimized the PNG by ~62%! So there was a tie for 3rd.
Optimole was no slouch either, showing an optimization result of 59.4%, while TinyPNG looked good at 57%.
Our final take on the testing
After two real-world optimization tests, the overall winner is ShortPixel for both JPG and PNG optimization. Other contenders for JPG compression on WordPress include EWWW, TinyPNG, and Smush. Other suitable tools for PNG optimization are Smush, Imagify, and EWWW.
Note: You may see that the image degradation is more prevalent with extreme optimization settings. For instance, I actually noticed a clear difference in how the PNG looked through Optimole – since by default that plugin gets more aggressive with its file shrinking.
👉 With this out of the way, below is our in-depth comparison of the best WordPress image optimizer plugins on the market:
The six WordPress image optimizer plugins we’ll compare
Here are the six WordPress image compression plugins that we’ll test and compare:
- ShortPixel Image Optimizer
- Optimole
- Imagify
- EWWW Image Optimizer
- Compress JPEG & PNG images by TinyPNG
- Smush Image Compression and Optimization
1. ShortPixel Image Optimizer

How’s the interface? 🤔
ShortPixel’s dashboard offers simplicity and quick buttons to choose your compression type, handle image backups, and resize large images. There are numerous extra tabs for advanced features. However, the average user can go with the default settings, and the main page is mainly where you’ll stick around.
![]()
An API key is required, but you can request an API within seconds right from the dashboard.
How are the features? ⚙️
ShortPixel lets you choose from Lossy, Glossy, and Lossless modes. They even have a testing link to help you decide between the three options.
![]()
You can also resize large images upon upload and see how much space you’ve saved.
ShortPixel has some other features that more advanced users will like, including:
- PDF optimization
- WebP image support
- Cloudflare integration if you’re using a CDN
- Additional media folders
- PNG to JPEG conversion
- Optimization of retina images
- Thumbnail optimization or exclusion
How’s the pricing? 💰
ShortPixel provides 100 free image credits every month. If you need more, the plans start at $3.99 for 7,000 image credits. File size limit is 100MB for all the plans, and you can upgrade to optimize more images.
2. Image optimization service by Optimole
How’s the interface? 🤔
Optimole’s image optimization plugin is clean and modern, with most of the tools running in the background without you knowing. It requires a quick account creation and API key insertion. After that, you can view all optimized images in the dashboard and change certain settings like image replacement, resizing of large images, compression quality, and lazy loading.

Optimole also has its own dashboard outside of WordPress. Here you can find more detailed information like the optimization sizes and monthly reports.
How are the features? ⚙️
Optimole completes all image optimizations automatically. It’s also powered by a CDN so you don’t have to worry about your images loading slowly. Tracking is one of the best features, since you receive very specific details on which images got optimized, and how much space you saved. Along with lazy loading and image resizing, Optimole provides a nice optimization package without the need to pay any money.

How’s the pricing? 💰
The Free plan allows 5,000 unique visitors per month and unmetered bandwidth, making it an excellent fit for personal WordPress blogs. They sell three other plans, starting at $19.08 per month (when billed yearly) for 50,000 unique visits each month, auto-scaling images, smart lazy-loading, and customer support. You also receive a CDN when upgrading to a paid plan, to host your images externally.
Optimole sells a Business plan starting at $39.08 per month for 100k monthly visits. You can upgrade for more visitors. The Business plan allows for a custom domain as well.
3. Imagify

How’s the interface? 🤔
Imagify is an image compression plugin for WordPress that has the best-looking Settings module on this list. It’s broken down into General Settings, Optimization, and Display Options, with only one page to manage settings.

We like how the optimization choices get presented with large buttons.

You must sign up for a free account to acquire an API key to activate Imagify’s features.
How are the features? ⚙️
In the optimization testing, Imagify performed well. But that was while using the default Smart optimization setting. You can also go with Lossless. These are the two compression levels you will find in Imagify. So, you could compress your images more, or less, if you’re worried about quality.

Other than that, you can set up most features for automation. For instance, you might resize all images to a specific width. There’s even a tool for optimizing your WordPress theme.

How’s the pricing? 💰
Imagify pricing has three plans based on the total image size of your monthly uploads. The free plan allows 20 MB of images per month, which they estimate as 200 images.
The Growth plan offers 500 MB per month (aprox. 5,000 images) for $4.16, while the Infinite plan provides unlimited uploads and starts at $8.33 per month (when paid yearly).
4. EWWW Image Optimizer

How’s the interface? 🤔
EWWW offers an updated, one-page interface to see an optimization score, local compression savings, and recommendations to improve optimization across your site.

New media uploads occur in the background, and the plugin offers a bulk optimizer to speed up the process. Compressions happen without acquiring an API key, which makes the interface a little easier to understand than the competition. However, you have the option to use the API for improved optimization and priority support.
How are the features? ⚙️
EWWW offers JPG, PNG, GIF, and PDF optimization. There are also options for both lossy and lossless compression. The major benefit is that EWWW has no limits on file sizes or the number of images uploaded.
Additionally, the free version of EWWW performs optimizations on your own web server, whereas all the other tools use external servers. This is nice for privacy-focused sites. But it can put a strain on your server if you optimize a lot of images at once.
As a bonus, EWWW offers Easy and Ludicrous Modes. The Easy Mode has all the essentials for out-of-the-box compression, while Ludicrous Mode opens up many options for conversions, overrides, resizing, and more.

How’s the pricing? 💰
The main EWWW plugin is free. For extra features, consider one of the paid plans:
- Standard: $7 per month for extras like CSS optimization, a limited CDN, and 200 GB bandwidth. This plan supports one site.
- Growth: $15 per month for 10 sites, a global CDN, 400 GB bandwidth, and custom domain support.
- Infinite: $25 per month for unlimited sites, 800 GB bandwidth, and site speed audits.
5. Compress JPEG & PNG images by TinyPNG

How’s the interface? 🤔
The TinyPNG plugin sticks to the basics, with a simple, clean Settings page. It takes maybe 20 seconds to understand what’s going on and activate your automated optimization process.

It’s the closest thing to a beginner’s interface you can find, with recommended settings throughout the process and only a few steps to complete everything you need.
How are the features? ⚙️

TinyPNG automatically compresses and resizes images upon upload. It also has options for optimizing previously uploaded images. Furthermore, TinyPNG lets you resize images on the WordPress dashboard while also choosing which image sizes to compress, from thumbnails to the original images. Along with no file size limits and WooCommerce support, this is a pretty appealing plugin.
How’s the pricing? 💰
They restrict the number of free uploads to 500 per month, but that’s often all smaller to mid-sized sites need. After that, the starting price is $0.009 per image for the next 9,500 images. The price per compression decreases to $0.002 after 10,000 compressions.
6. Smush Image Compression and Optimization
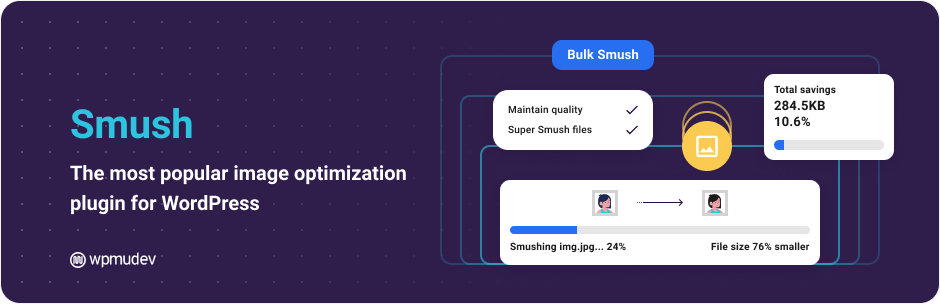
How’s the interface? 🤔
Smush has a beautiful interface with proactive elements that ask if you’d like to optimize both old photos and new ones. The plugin even offers a quick setup wizard to configure all the basic settings from the start.

The main advantage of Smush is the amount of information provided about your images and how much space you’ve saved.

How are the features? ⚙️
Resizing and optimization are both included with new and old pictures. The bulk optimize tool is great for when you have several pictures.
In the free version, you can only bulk optimize 50 old images at a time, so you might need to click the button a few times if you have lots of images.
Other features from Smush include metadata stripping, automated image resizing, and options to backup your images after uploading them.

How’s the pricing? 💰
One of the benefits of Smush is that it lets you optimize unlimited images for free. There is just one caveat – individual images cannot exceed 5MB.
To remove that limit, you can use WP Smush Pro. This premium plugin starts at $7.50 per month (if you need it for only one website). For additional website support, or to get all the developer plugins from Wpmudev, you can upgrade to pricier packages.
Which WordPress image optimizer should you go with?
Overall, all of these WordPress image optimizer options are great in their own ways and they will all help speed up your WordPress site.
A lot of this is going to come down personal preference and which interface feels more comfortable for you to navigate. That’s exactly why we included the “Test Drive” links at the bottom of each review, because we encourage you to do exactly that – try them out.
Get a feel for how they work, and then make your decision from there.
Here’s a recap of the six tools we just reviewed:
- ShortPixel – For the best optimization and a sleek interface.
- Optimole – For a fairly powerful free plan and included CDN, lazy loading, and the option to always display a version of the image that’s optimized, specifically to the viewer’s screen and device.
- Imagify – For excellent compression, features, and interface.
- EWWW – For a free WordPress image optimizer and no file size limits. And options to use your own server or a third-party.
- TinyPNG – For excellent optimization and the simplest of all interfaces.
- Smush – For unlimited free lossy or lossless compression (with a 5MB max for each image).
If you have any further questions about the best WordPress image optimizer tools, let us know in the comments.


Or start the conversation in our Facebook group for WordPress professionals. Find answers, share tips, and get help from other WordPress experts. Join now (it’s free)!